No Arbor Press, No Problem!
This post contains affiliate links. When you purchase items from certain links, at no additional cost to you, I receive a commission. For more information, please see my legal page.

I’ve been sending out more and more bookmarks recently. I suppose it makes sense with back-to-school lurking in the coming weeks. One of my most popular bookmarks this year features a hand stamped scorpion. As I was making a couple of these guys this week, I decided I wanted to share with you all my stamping process.
Typically, these stamps are applied with the use of a stamp post and hammer or with an arbor press. For those of you who are not familiar with an arbor press, they range in tonnage of pressure and allow you to imprint stamps, punch holes, or apply rivets with minimal effort. While I hope to someday include one of these bad boys in my shop, I don’t currently have one. As far as the stamp post and hammer route, I just can’t seem to get the clean deep impression that I want with that method. I know some amazing leather artists who get beautiful results using a hammer, it’s just not something I have been able to get the knack for. Until I get my arbor press, I’m using my own method.
Step One: Gather Your Supplies
You’ll need the appropriate leather for your project. For a bookmark, I like to use 3-4 oz. It’s thick enough to hold the stamp, but thin enough to be used in a book. If you’re looking for bookmark blanks to get creative with, you can purchase them from my shop, here.

Choose the stamp you’d like to use. For this stamping method, I have the best luck with one-inch stamps. For larger stamps, which I have 3D printed and will offer in the future, I use multiple clamps. For the purpose of this simple tutorial, we’ll stick to the one-inchers today. I have several of these guys that have a hole in the back to use a universal post. The post is not necessary for the stamping method I’ll be showing you today. By the way, you can snag the entire Celtic knot collection here.
A hard flat surface with an edge off the ground. I use my workbench with a granite slab, but any table will work. You want the surface to be smooth, any indentation or mark on the surface will be stamped into the underside of your leather!
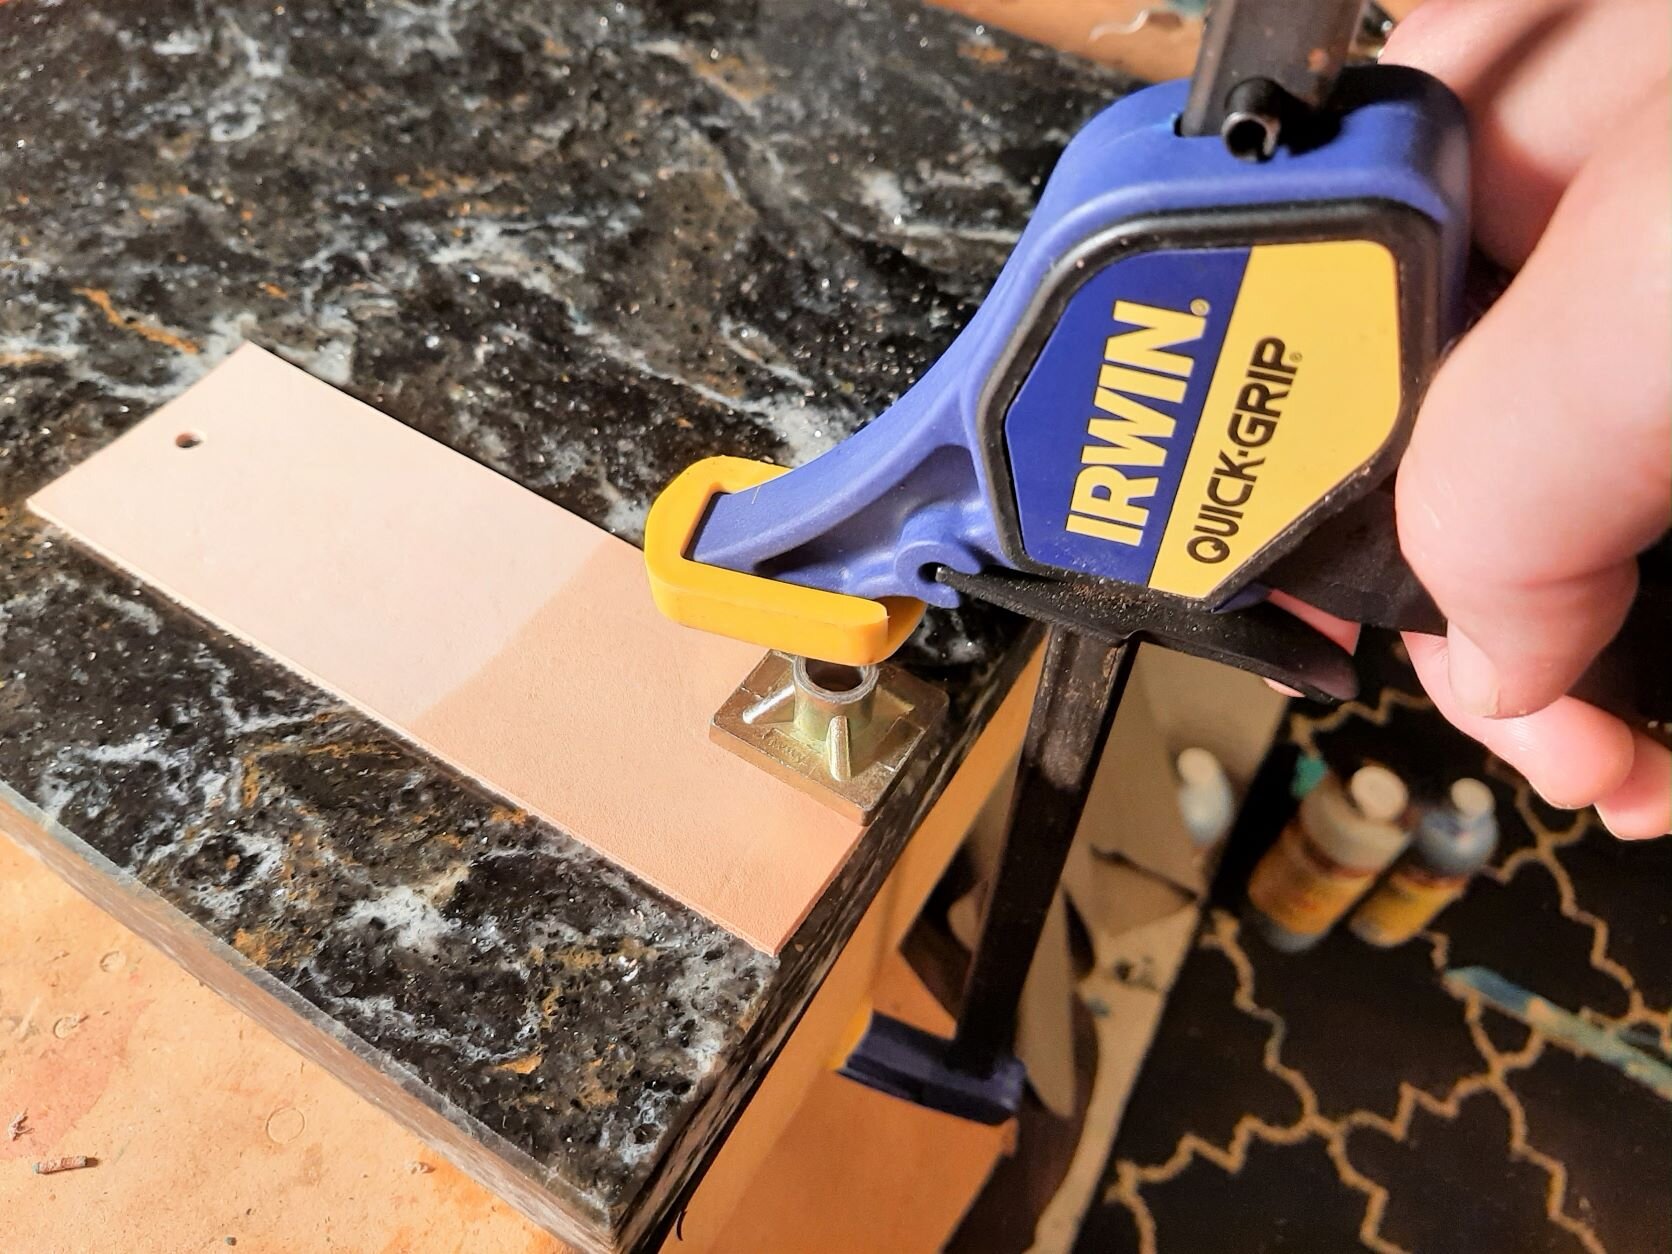
A clamp. I absolutely love my set of Irwin Quick-Grip clamps. They’re easy to use, large enough to fit on my workbench with the granite slab, and the clamp pad fits perfectly on a one-inch stamp. They’re available in various lengths and combination packs. Get the one that will fit your needs.


Step Two: Case Your Leather
Casing is a process that is done to soften the fibers of the leather. This is achieved by wetting the leather and waiting for the moisture to completely soak in. As you can see in the picture on the left below, freshly wetted leather will have a pool on the surface. Once it has properly cased it will be darker in color, as in the picture on the right, but no longer have standing water. I use room temperature water to do this. Hot water will cause shrinkage and stiffening. We don’t want that for this particular project.


Step Three: Place and Clamp
At this point you want to figure out where you want your stamp on the leather. Be careful not to press the leather as you adjust placement. After being cased it will be super pliable and accept marks easily. Once your stamp is in place clamp it down as tightly as possible.
Step Four: Wait
The impression is achieved quickly after pressure is applied. However, I like to wait until the leather is dry. This gets a really nice deep crisp impression. It’s not entirely necessary to wait that long, but I personally think I get the best results when I wait. In this video I did not wait for the leather to dry. As you can see, it works just fine, but I truly love the look the stamp achieves after drying. It is truly up to personal preference with the wait time. Play around with timing and see what you prefer.
That’s it! It’s a little bit more involved than using an arbor press, but if you don’t have one in your shop I feel like this is a great alternative. You still get a much deeper, cleaner stamp than you will with the post and hammer without the expense or space requirements of the press.
Thank you for joining me today, and as always, life’s better with leather!
jess
Drop me a comment below, I’d love to chat! Never miss a post, hit the subscribe button AND get 10% off your first order!